Using Network Policies to control traffic in Kubernetes
This is the first part of our “Kubernetes Security Series”. In this part I’m going to explain how Network Policies can help you secure your network traffic within your Kubernetes cluster.
Filtering network traffic
First of all, you need to think about what kind of network traffic you want to filter. The easiest way filtering traffic is on Layer 3 and 4, which is at the IP address and port level. If you’d like to filter on http/https hostname, then you’ll need Layer 7 filtering, which is currently not supported by Kubernetes Network Policies. For that, you would need a separate proxy server within your cluster.
On Layer 3 and 4 filtering, if you’d like to filter traffic to github.com, you’d filter based on the IP address and port 80/443 (http/https). If github.com changes IP address, you’d have to change your Network Policy rules. If you’re capable of doing Layer 7 filtering, then you could examine the hostname that passes port 80/443, and only filter if the hostname matches github.com. A sidenote: even on port 443 using https, if SNI (Server Name Indication) is used, then the hostname is passed unencrypted. SNI is currently widely used.
We’ll keep Layer 7 filtering for another blog post, as this is currently much more complicated, because you cannot use Network Policies for that. You would need an ingress/egress proxy that understands Layer 7 (http/https) traffic, like Envoy proxy. More traditional reverse proxies like haproxy/nginx could also be used for this.
The Network Policy
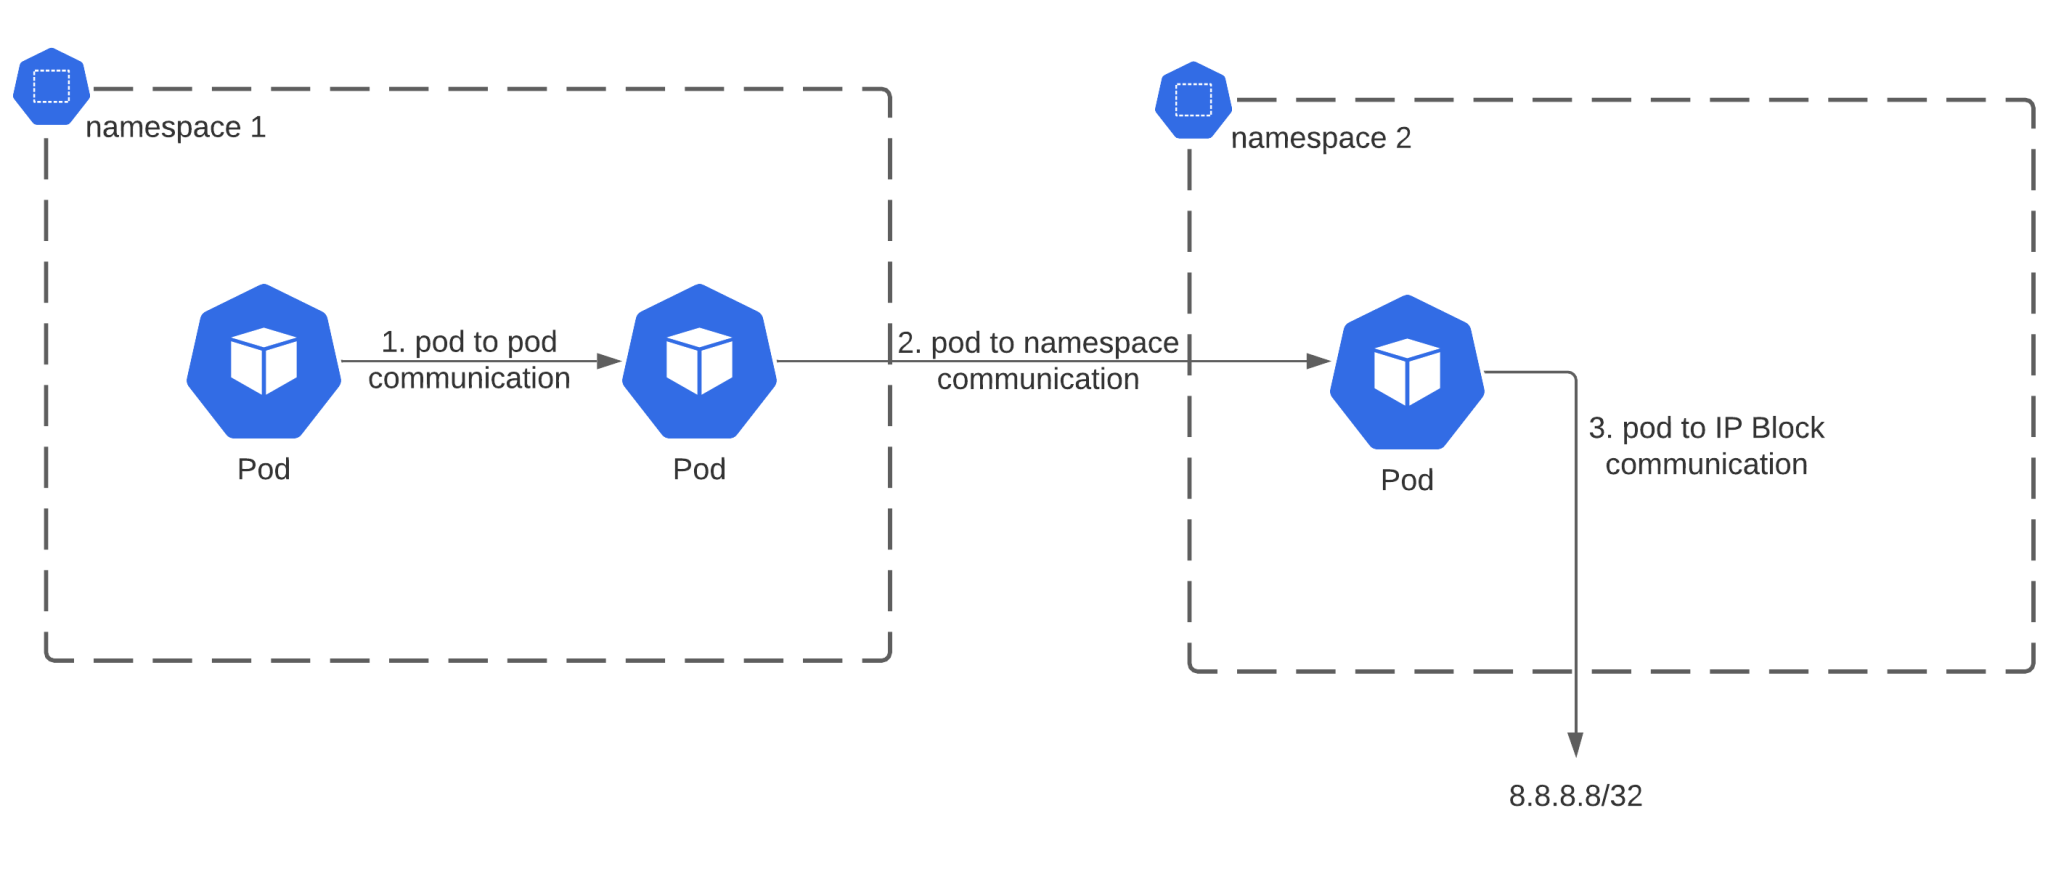
Let’s talk about the Network Policy itself! The NetworkPolicy resource in Kubernetes allows you to manage Layer 3 and 4 traffic on a pod level. The NetworkPolicy documentation specifies 3 combinations you can use to manage traffic:
- Pod-to-pod traffic by identifying the pod using selectors (for example using pod labels)
- Traffic rules based on Namespace (for example pod from namespace 1 can access all pods in namespace 2)
- Rules based on IP blocks (taking into account that traffic to and from the node that the pod is running on is always allowed)

Secure network traffic
To secure your network traffic, you will need to disable the default behavior to allow all ingress and egress traffic. To make this easier, you can first disable ingress traffic, figure out what rules you need to make your pods working again, and then start with egress traffic restrictions. It’s going to be much more difficult to figure out egress traffic rules than ingress traffic, as it’s often not obvious what external traffic your applications will initiate.
A Network Policy to deny all traffic by default will look like this:
---
apiVersion: networking.k8s.io/v1
kind: NetworkPolicy
metadata:
  name: default-deny-all
spec:
  podSelector: {}
  policyTypes:
  - Ingress
  - Egress
This rule will match all pods (podSelector: {}), and will deny ingress/egress traffic, if no other rule is in place to allow traffic.
Ingress traffic
Allowing ingress is the easiest to do if you have a single point of entry. This is the case if you’re using an ingress controller. You then only need to ensure access to the ingress controller, and from the ingress controller to the backend pods. Here is an example of such a NetworkPolicy:
---
apiVersion: networking.k8s.io/v1
kind: NetworkPolicy
metadata:
  name: ingress-access
spec:
  podSelector:
    matchLabels:
      app.kubernetes.io/name: ingress-nginx
  ingress:
  - from:
    - ipBlock:
        cidr: 192.168.1.0/24
---
apiVersion: networking.k8s.io/v1
kind: NetworkPolicy
metadata:
  name: ingress-to-backends
spec:
  podSelector:
    matchLabels:
      app: myapp
  ingress:
  - from:
    - namespaceSelector:
        matchLabels:
          ingress: "true"
      podSelector:
        matchLabels:
          app.kubernetes.io/name: ingress-nginx
There are 2 rules here. The first rule, called “ingress-access” will be applicable on pods that have the label app.kubernetes.io/name=ingress-nginx. Pods that match will allow traffic from 192.168.1.0/24. This IP range could be your local IP range if you’re using minikube, or a Virtual Private Cloud network range on cloud providers. In those ranges you typically run the LoadBalancer which needs access to the ingress controller. If you’re not using a cloud Load Balancer, then it can even be 0.0.0.0/0 in case you want to let everyone access your ingress controller.
Once traffic hits the ingress controller, it’ll proxy the requests to the backend services. We need to allow traffic between this ingress controller and the backend services, which can be done using the second NetworkPolicy, in our example “ingress-to-backends”. This rule matches the pods with the label “app=myapp”. You can make this a more generic label that you assign to all your backend pods. These pods need to allow traffic from the ingress controller, so we specify an “ingress” rule with “from” to match the namespace (ingress=true) and the pod with the label “app.kubernetes.io/name=ingress-nginx). Make sure to label the namespace where your ingress controller is running in to make this work. The end result should be something like this:

Egress traffic
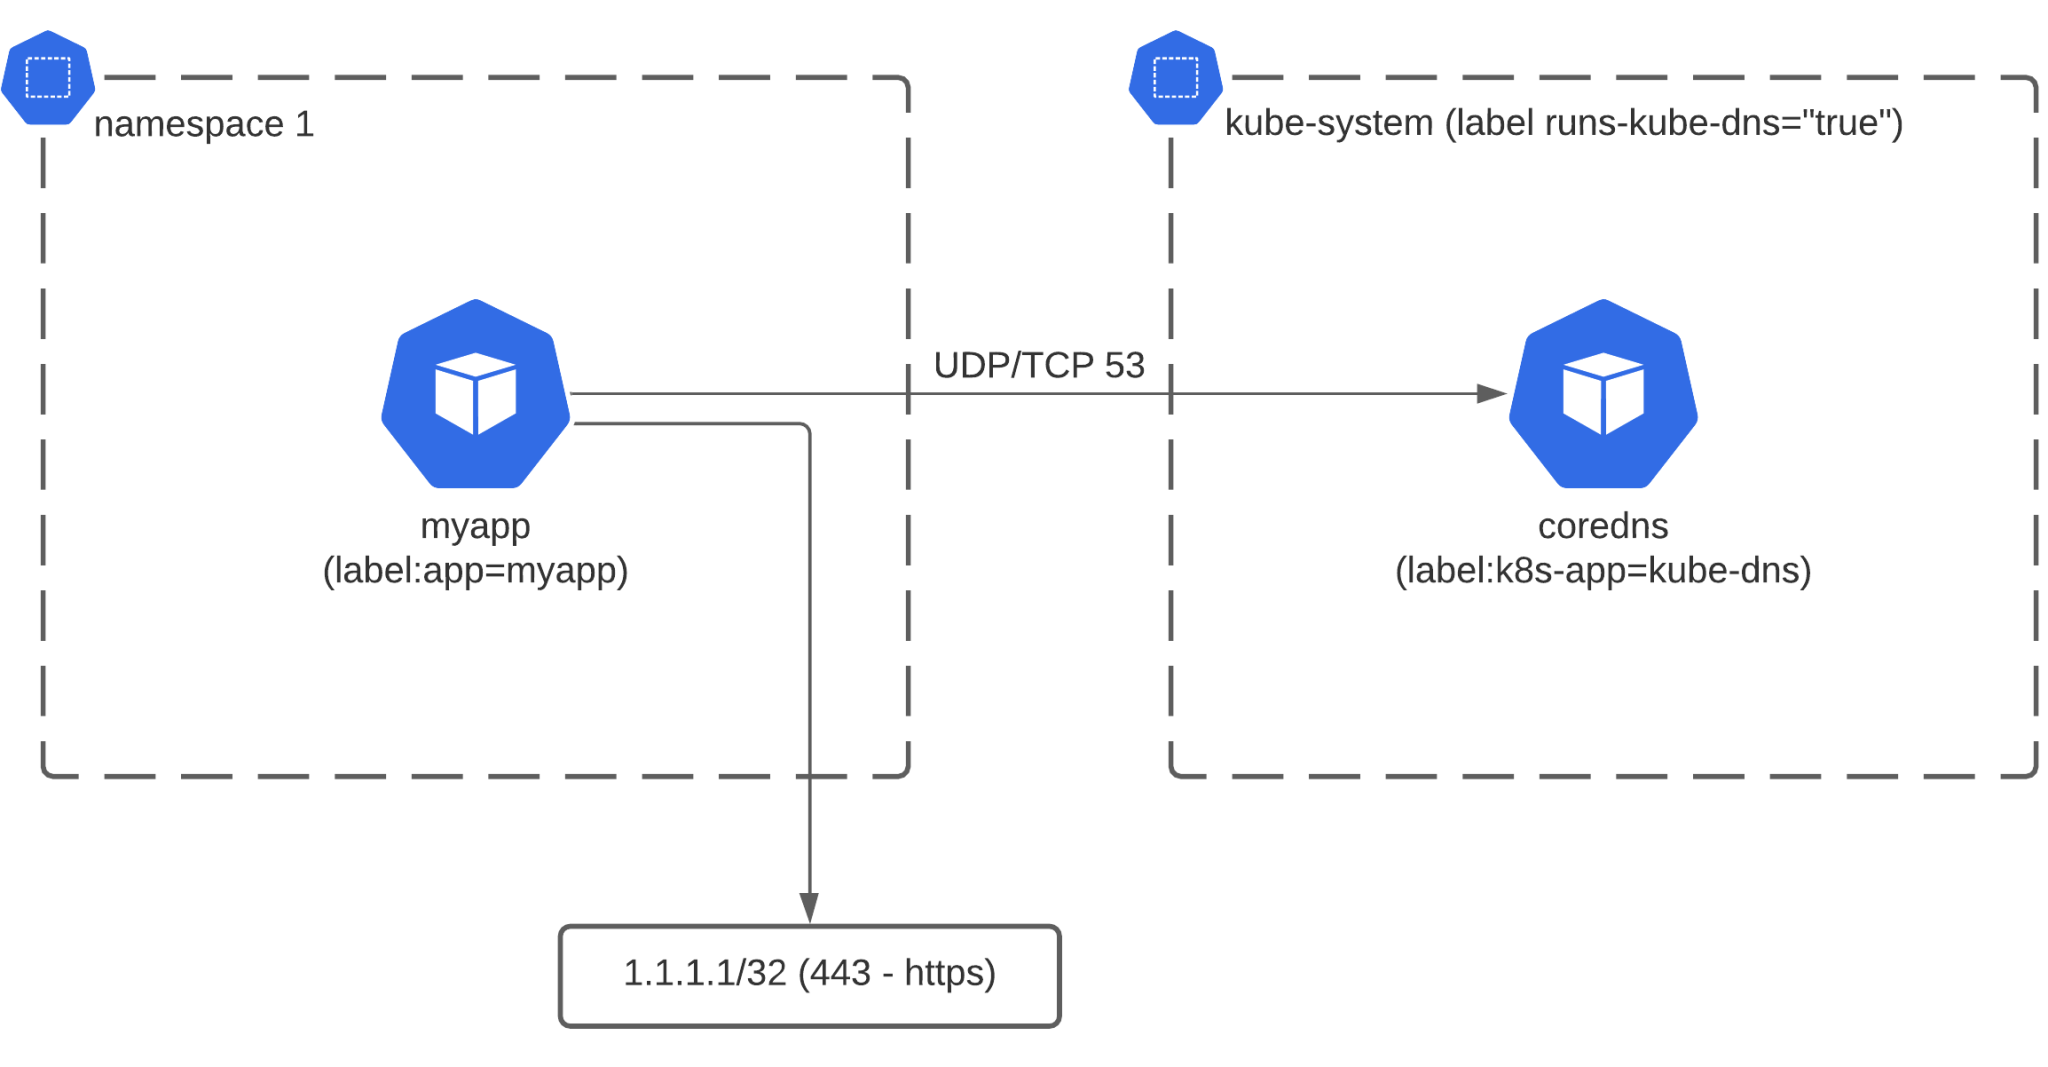
Traffic originating from a pod will be controlled by the egress NetworkPolicy rules. The typical application will need to do DNS lookups (translating for example google.com to an IP address) before making a request to an external server. The DNS server typically runs within the Kubernetes cluster, so that’ll be the first rule you need when blocking all egress traffic. Below is an example of such a rule that blocks all egress traffic, but allows DNS traffic to the DNS pods running in the kube-system namespace (kube-system needs to be labelled with kube-dns: “true”):
apiVersion: networking.k8s.io/v1
kind: NetworkPolicy
metadata:
  name: deny-egress-allow-dns
spec:
  podSelector: {}
  policyTypes:
  - Egress
  egress:
  - to:
    - namespaceSelector:
        matchLabels:
          kube-dns: "true"
      podSelector:
        matchLabels:
          k8s-app: kube-dns
    ports:
    - protocol: TCP
      port: 53
    - protocol: UDP
      port: 53
Once this Network Policy is in place, you’ll need to make sure you have an egress rule for every outgoing connection that any pod in the Kubernetes cluster can make. If an application uses for example an external API for transactional emails, or connects to external cloud services, then you’ll need a Network Policy covering this.
Most cloud services will have a list of IP addresses and IP ranges, which you can use to whitelist egress traffic. It can definitely be a long process to get it right if you have a lot of external dependencies. Once you deny all egress traffic by default, you’ll need to do some testing to trigger all the external endpoints and test whether they still work.
Below is an example rule to allow https (port 443) traffic to a specific IP address.
---
apiVersion: networking.k8s.io/v1
kind: NetworkPolicy
metadata:
  name: egress-access-myapp
spec:
  podSelector:
    matchLabels:
      app: myapp
  egress:
  - to:
    - ipBlock:
        cidr: 1.1.1.1/32
   ports:
    - protocol: TCP
      port: 443
After applying this NetworkPolicy, the pod with the label app=myapp will be able to access hostnames that resolve to the IP address 1.1.1.1 (a CloudFlare IP) on port 443. This diagram summarizes our setup after applying both Network Policies:

This article shows you how to filter Layer 3 and 4 traffic using NetworkPolicies. Unfortunately at the time of writing, there’s no Layer 7 support in NetworkPolicies. To filter on http/https hostname or other protocols, we would need to redirect all the traffic through an egress proxy/gateway – which we’ll explain in another blog post!